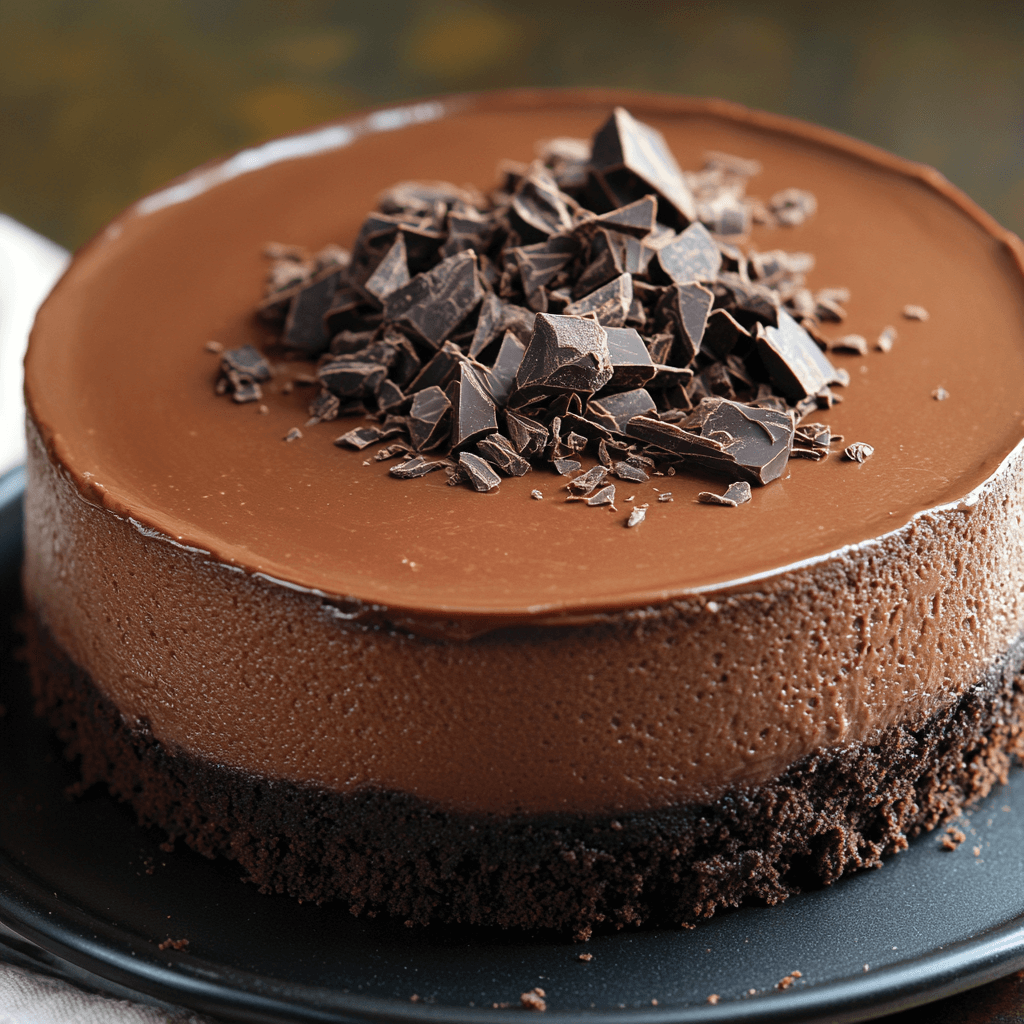
Chocolate Cheesecake Recipe for Beginners to Master
Introduction
Chocolate cheesecake is the epitome of dessert perfection, marrying the indulgent richness of chocolate with the creamy decadence of cheesecake. For beginners, the thought of making a cheesecake from scratch can feel daunting, but with the right guidance and tips, it becomes a delightful journey. This recipe is designed to be simple yet rewarding, offering a foolproof method to craft a velvety chocolate cheesecake that will wow anyone lucky enough to try it.
From the crisp, chocolatey crust to the smooth ganache topping, each layer contributes to a symphony of textures and flavors. Whether you’re preparing this dessert for a special occasion or a quiet evening treat, this guide ensures success every step of the way.
Essential Ingredients for a Perfect Chocolate Cheesecake
Crust
The crust is the unsung hero of any cheesecake, providing the structure and contrast needed to support the creamy filling. Chocolate cookie crumbs, such as finely crushed Oreos without the filling, are a perfect choice. These crumbs create a sturdy base with just the right amount of sweetness.
Filling
The filling is the star of the show, combining softened cream cheese, granulated sugar, sour cream, cocoa powder, and melted semi-sweet chocolate. Each ingredient contributes to the luxurious texture and rich flavor. Eggs, added one at a time, help bind the mixture without over-aerating it, ensuring a dense and silky consistency.
Ganache Topping
Ganache adds a glossy, professional finish to your cheesecake. Made by combining heavy cream and semi-sweet chocolate, this topping not only enhances the appearance but also introduces a smooth, chocolatey richness that elevates the entire dessert.
Tools and Equipment You’ll Need
To achieve a professional-quality cheesecake, you’ll need a few essential tools:
- Springform Pan: This pan’s removable sides make it easy to release the cheesecake without damaging its structure.
- Stand or Hand Mixer: A mixer ensures the batter is smooth and well-incorporated.
- Rubber Spatula: Ideal for scraping down the sides of the mixing bowl to avoid lumps.
- Baking Sheet: Essential for creating a water bath to prevent cracks.
- Heatproof Bowl: For melting chocolate and mixing ganache.
Preparing the Crust
A good crust sets the stage for a great cheesecake.
- Preheat the Oven: Set your oven to 325°F (163°C) to prepare for baking.
- Combine Ingredients: Mix 2 cups (200g) of chocolate cookie crumbs with ¼ cup (60g) of melted butter until the crumbs are evenly coated.
- Press Into Pan: Firmly press the mixture into the bottom of a 9-inch springform pan, ensuring an even layer. Use the bottom of a glass to smooth it out.
- Bake: Bake the crust for 10 minutes. This step ensures the crust holds together and doesn’t become soggy when the filling is added. Let it cool while you prepare the filling.
Creating the Creamy Filling
- Soften the Cream Cheese: Allow 24 oz (680g) of cream cheese to reach room temperature. This prevents lumps in the batter.
- Mix the Base: In a large bowl, beat the cream cheese until smooth. Gradually add 1 cup (200g) of sugar and ¼ cup (30g) of unsweetened cocoa powder, mixing until fully incorporated.
- Add Wet Ingredients: Blend in 1 cup (240ml) of sour cream and 1 teaspoon of vanilla extract.
- Incorporate Melted Chocolate: Gently mix in 12 oz (340g) of melted semi-sweet chocolate, which should be slightly cooled to prevent curdling.
- Add Eggs: Incorporate 3 large eggs one at a time, mixing on low speed. Overmixing can introduce air bubbles that may cause cracks.
Baking the Cheesecake
- Prepare a Water Bath: Wrap the outside of the springform pan in aluminum foil to prevent water from seeping in. Place the pan in a larger baking dish and fill the dish with hot water until it reaches halfway up the sides of the springform pan.
- Bake: Pour the filling over the cooled crust and smooth the top. Bake the cheesecake for 55–65 minutes. The edges should be set, and the center should jiggle slightly when shaken.
- Cool Gradually: Turn off the oven and leave the door slightly ajar, allowing the cheesecake to cool slowly for one hour. This prevents sudden temperature changes that can cause cracks.
Cooling and Setting the Cheesecake
Refrigeration is crucial for achieving the perfect texture. Transfer the cheesecake to the refrigerator and let it chill for at least 6 hours or overnight. This gives the filling time to firm up and develop its signature velvety consistency.
Crafting the Ganache Topping
- Heat the Cream: In a small saucepan, heat 1 cup (240ml) of heavy cream over medium heat until it begins to simmer.
- Combine with Chocolate: Pour the hot cream over 8 oz (226g) of chopped semi-sweet chocolate in a heatproof bowl. Let it sit for 5 minutes before whisking until smooth and glossy.
- Apply to Cheesecake: Allow the ganache to cool slightly, then pour it over the chilled cheesecake, spreading it evenly with a spatula. Let the ganache set before serving.
Serving and Presentation Tips
- Slice with Precision: Use a sharp knife warmed under hot water for clean slices. Wipe the blade between cuts for a polished presentation.
- Garnish Creatively: Fresh berries, whipped cream, or a sprinkle of cocoa powder can enhance both the flavor and visual appeal.
Common Mistakes and How to Avoid Them
- Cracks in the Cheesecake: Always use a water bath and avoid overmixing the batter.
- Overbaking: Remember, the center should still jiggle slightly when done. Overbaking leads to a dry texture.
- Underset Cheesecake: Chill for a minimum of six hours to allow the filling to set properly.
Variations to Try
- Peanut Butter Swirl: Add dollops of peanut butter to the filling and swirl with a toothpick before baking.
- Mint Chocolate Cheesecake: Incorporate a few drops of peppermint extract into the filling for a refreshing twist.
- Raspberry Topping: Substitute ganache with a layer of fresh raspberry puree for a tangy contrast.
Storage and Freezing Tips
- Refrigeration: Store the cheesecake in an airtight container in the refrigerator for up to five days.
- Freezing: For longer storage, wrap individual slices in plastic wrap and place them in a freezer-safe bag. Cheesecake can be frozen for up to three months. Thaw in the refrigerator overnight before serving.
Frequently Asked Questions
Can I Use Milk Chocolate Instead of Semi-Sweet?
Yes, but the result will be sweeter. Adjust the sugar in the filling to balance the flavor.
What’s the Best Way to Transport Cheesecake?
Keep it chilled in its springform pan, and place it in a sturdy box for transport.
Conclusion
This chocolate cheesecake recipe is the ultimate beginner-friendly guide to mastering a dessert that’s equal parts elegant and indulgent. From the crisp crust to the luscious filling and glossy ganache, every bite is a testament to the art of baking. With patience and attention to detail, you can create a showstopping dessert that will impress any crowd.
Whether it’s your first attempt or your fiftieth, this recipe promises to be a staple in your dessert repertoire. Now, it’s time to roll up your sleeves and let the magic of chocolate cheesecake unfold in your kitchen!

